
Hi,
For one of my applications, I created an e-mail validation system after registration. Users who have just registered receive an e-mail containing a 4-digit code which they must enter on the confirmation page. Without this, they can’t use the application. It’s the same thing you see when you want to connect to your Stripe or Paypal account, for example.

It’s simple, but I thought it might be useful for other users. So here’s what I’ve done.
Creation of fields in the Users data type
I created a text field named Code pour confirmation (Code for confirmation). A text field in case the generated code starts with zero.
I’ve also created a boolean field called E-mail vérifié (Verified e-mail), which defaults to “no”.
Creation of the registration popup
For registration, I’ve created a simple popup with First name, Nickname, E-mail and Password:

When the user clicks on Je m’inscris (I’m registering), I use the Sign the user up action with, among the fields filled in when adding the user, the Code pour confirmation field. I use the Data sources named Calculate formula of type Generate random string. I set Length of characters to 4 and only check Use numbers:

After this action, I send an e-mail containing the code with Current User’s Code pour confirmation.
I’ve also created a reusable popup that appears on every page of the website where the user needs to be logged in. It only appears if the E-mail vérifié field is set to no, to tell the user that he needs to validate his e-mail with the code received (with a button to redirect him to the page):

Creation of the confirmation page
-
I’ve created a page called Confirmation with 4 inputs whose Content format is Text, the number of characters is limited to 1 and the field must not be empty.
-
To ensure that the user can only enter numbers, I use the Input Mask plugin. I therefore place 4 Mask Input elements in a group on the page. For the Id Attribute Input, I put Code1 for the first one, Code2 for the second, and so on. For Mask field, I’ve set 0 to allow only one number:
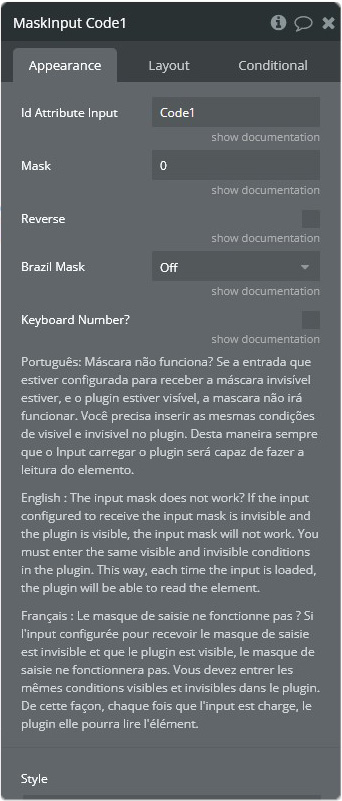
If you haven’t already done, check the Expose the option to add an ID attribute to HTML elements box at the bottom of the General tab on the Settings page. Then, on each input, you need to transfer the name given in each Mask input. So for the first input, the ID Attribute is Code1, for the second Code2 and so on:

-
I then created an input named Input Concatenation whose Initial content is
Input Code1's value append Input Code2's value append Input Code3's value append Input Code4's value, again with Content format set to Text. -
Finally, for the first 3 inputs, I’ve set a Do when condition is true workflow to Every time, where the condition for the first is
Input Code 1's value is not emptyand the action is Set focus on Element Input Code2, so that each time a digit is entered, the cursor moves on to the next input. I’ve done the same for the 2nd and 3rd inputs, but not the 4th, since you can’t set focus on a button:

Buttons
- I’ve created a button called Je confirme mon adresse e-mail (I confirm my e-mail address) with a condition:
When Input Concatenation's value is empty or Current User is logged out(for this second part of the condition, I display a red text if the user isn’t logged in, telling him to do so in order to validate), then the element is not clickable.
On clicking this button, 2 workflows are possible:
-
Current User's Code pour confirmation is Input Concatenation's value(the code is correct) then I modify the user to empty the Code pour confirmation field and change the E-mail vérifié field to “yes”, I warn the user that his e-mail is validated (with the myAlerts! plugin) and I redirect him to the Dashboard page:
-
Current User's Code pour confirmation is not Input Concatenation's value(the code is incorrect), I simply warn the user that the code is not correct:


- I’ve created another button called Je veux recevoir un nouveau code (I want to receive a new code), whose workflow acts in the same way as at registration, i.e. Make changes to current user (to generate a new code) and Send email (to resend the regenerated code):

The procedure is the same if you want to use more digits for the code.
However, I haven’t found a solution if you copy-paste the code into the first input so that it sticks each digit into the others. If anyone has a solution ![]()
Hope this helps ![]()