Hoping you can help with a custom Twitter integration. It relates to Elevated Access, which I now have, but when I try initialise the API, it shows me an error. I’ve set the API up as this:
I have Elevated access as shown below, with V1.1 and V2.0 API access (and what I want to do requires the stricter V1.1 access). It’s been a few days, so I don’t think it’s a time/propagation issue.
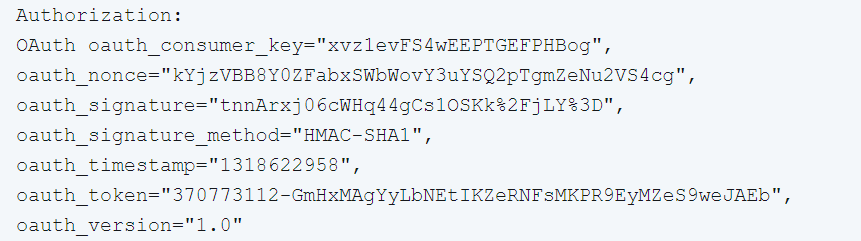
I followed the example here for Auth setup, so I want to say that’s correct (encoded Consumer [API Key]:[API Secret] as Base 64). I’ve also regenerated the API Key and Secret and that didn’t help. I’ve also tried the Bubble Twitter plugin and that showed the same result (using Consumer API Key and Secret), Error 403 “Need Elevated Access”. Also tried encoding Client_ID:Client_Secret, which yields the below, which makes me think the ‘Elevated Access’ error is a step closer at least.
Ok, Twitter Dev support got back to me; they said this: *The v1.1 endpoints mostly use OAuth1.0a - specifically for the /1.1/account/update_profile.json endpoint you must use OAuth1.0a with user context (from the 3-legged OAuth flow). * OAuth2 is not available for the old v1.1 endpoints.
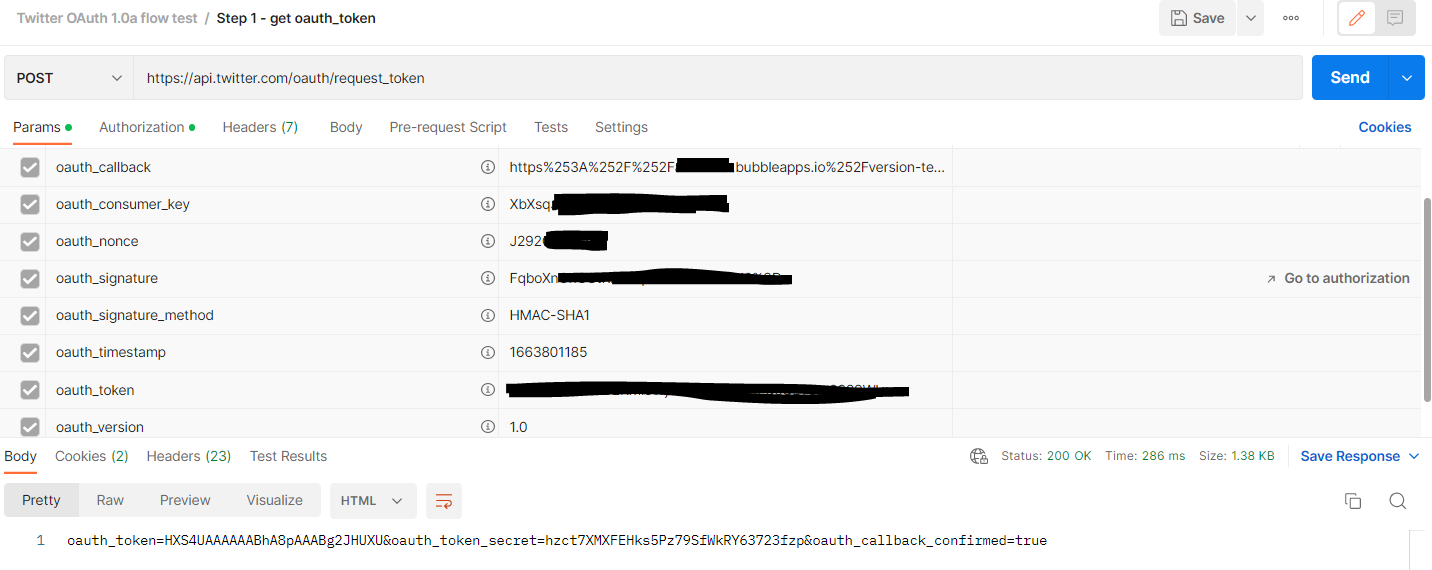
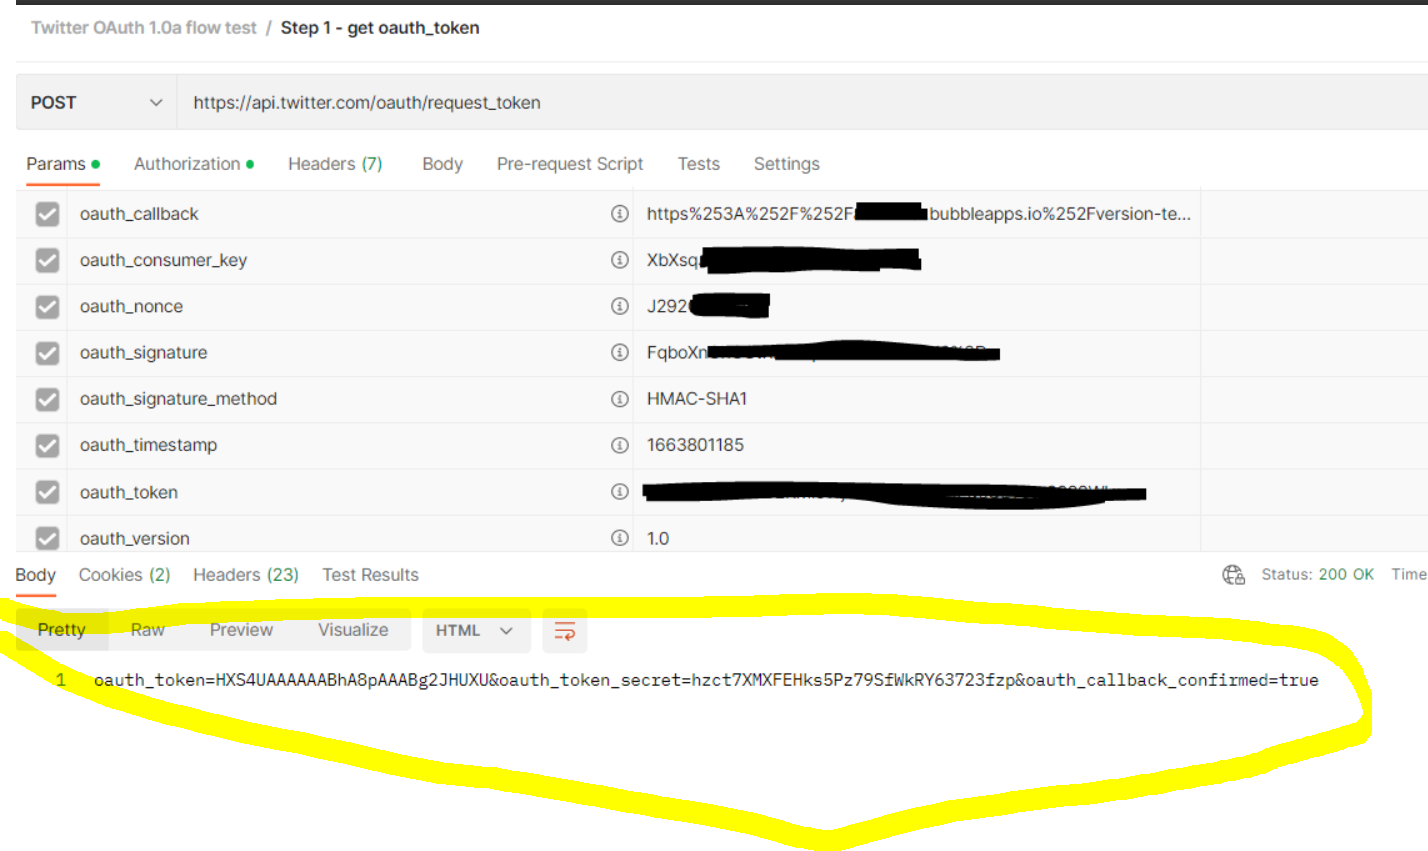
I’ve been struggling to make this work. I tried in Postman to use https://api.twitter.com/oauth/request_token. It worked there, which was awesome, so it looks like my credentials were accepted and my Elevated Access was correct.
But as I understand it, the oauth_nonce; oauth_signature and oauth_timestamp are created dynamically for each request. I tried this plugin, but got the below error, which looks the same as previous errors re Elevated Access.
But Postman worked with my credentials, and returned a good 200 response. So is Bubble/the Handler plugin the problem (@redvivi)? @emmanuel any ideas? Any help would be greatly appreciated! @Jici I’ve seen you’ve offered great help before on APIs; any ideas here?
Personally I create my own plugin to handle the signature part.
But actually, the error message is probably not related to the plugin itself.
I think that you probably use the same API that you already have client_credentials auth. You cannot match two different auth for one API. So you need to create a different API. In the case of the API with oAuth1, it will also be self-handled
I took your advice and set up a new ‘app’ in the Developer Portal, regenerated keys, and, crucially, edited the below section. Apparently you need to select the 3rd option (I thought 2nd covered my case)!
@redvivi or @Jici any ideas why the API I created (set as “Action”, not “Data”) doesn’t show up as an action when building the workflow steps? Is this a Bubble error? Most errors point to that, but I’ve got mine set as Action…
Go to “Plugins” section, add the Bubble API Connector plugin - Done
Define an API Name for a new API call - Done
Set “None or self-handled” as Authentication, click on “Expand”, - Done
Define a Name, configure the API Call URL (POST or GET) as Action (not Data) - Done
Data type JSON - Done
And define a new Headers key named “authorization” and parameterised value as “[AuthHeader]” for instance, allowing to set the Header dynamically in the workflow. - Done
Step 3: This is the problem I think; why is the API I just created (with ‘Use as: Action’) not available as an action in the Workflow editor?
I’ve refreshed, re-installed the Handler and API Connector and had no luck. I copied the API settings from the Demo Editor and that also didn’t work; also tried it on a blank app and didn’t work. Is it a Bubble error; do I have to be on a non-Free plan? I can’t initialise the API as it needs Authorisation. I tried to Preview it and that didn’t work.
Back to the workflow, add after the “Generate OAuth1.0a Header” action your API call action defined at step 2
And map the output of the “Generate OAuth1.0a Header” action in the API Call “authorization” input parameter that you set up at the same step.
Thanks so much, is that using the ‘Manually enter API response’ link? And would I essentially just copy the raw response’s details from something like Postman?
Now I’m a lottle confused. I’m stuck at Point 3, as the instructions say the below. But I don’t see the action for the API (I’ve attached a screenshot from the Demo App - my app doesn’t show the highlighted API Call.)
@Jici says I need to initialise the API for it to show up, but your instructions say initialise at Step 4. So do you know why the API call isn’t showing up in the workflows for Step 3?
3) Back to the workflow, add after the “Generate OAuth1.0a Header” action your API call action defined at step 2, and map the output of the “Generate OAuth1.0a Header” action in the API Call “authorization” input parameter that you set up at the same step.
Actually, in your update bio endpoint, I don’t see any body. Pretty sure this is requested. And I don’t know for twitter, but in most case, the body is also part of the signature.
Ok, @Pathfix is just awesome! Days of struggling with other methods, and then I see @rod.danan’s post, check them out and it’s sorted in a day. Amazing stuff, well done team! Got a few projects in-mind for you!