Hello fellow Bubblers,
I’m trying to achieve a stacking cards on scroll effect in my Bubble app (ref code : https://codepen.io/tahazsh/pen/WNYKage)
I have managed to do this by creating a custom plugin, but as you can see in my Preview, it appears in the header of the page, before the rest of the content :
Is there a way to display a custom plugin anywhere on the page ?
thanks in advance,
Louis
Really nice effect,
It seems that your cards wrappers is outside of the Bubble page wrapper. It appear on top of the body.
You create the class=cards div with your plugin, but the problem is on your html for cards.
The code here seems to move the div on top of body, outside of the Bubble page element.
Can you be more precise about your page structure ?
Where did you put the cards html ?
Because the instance.canvas.append should create the cards div under the plugin div, this mean that something is moving it once created.
Hey Thomas,
thanks for your reply !
Here is a screenshot of my page structure in the Editor :
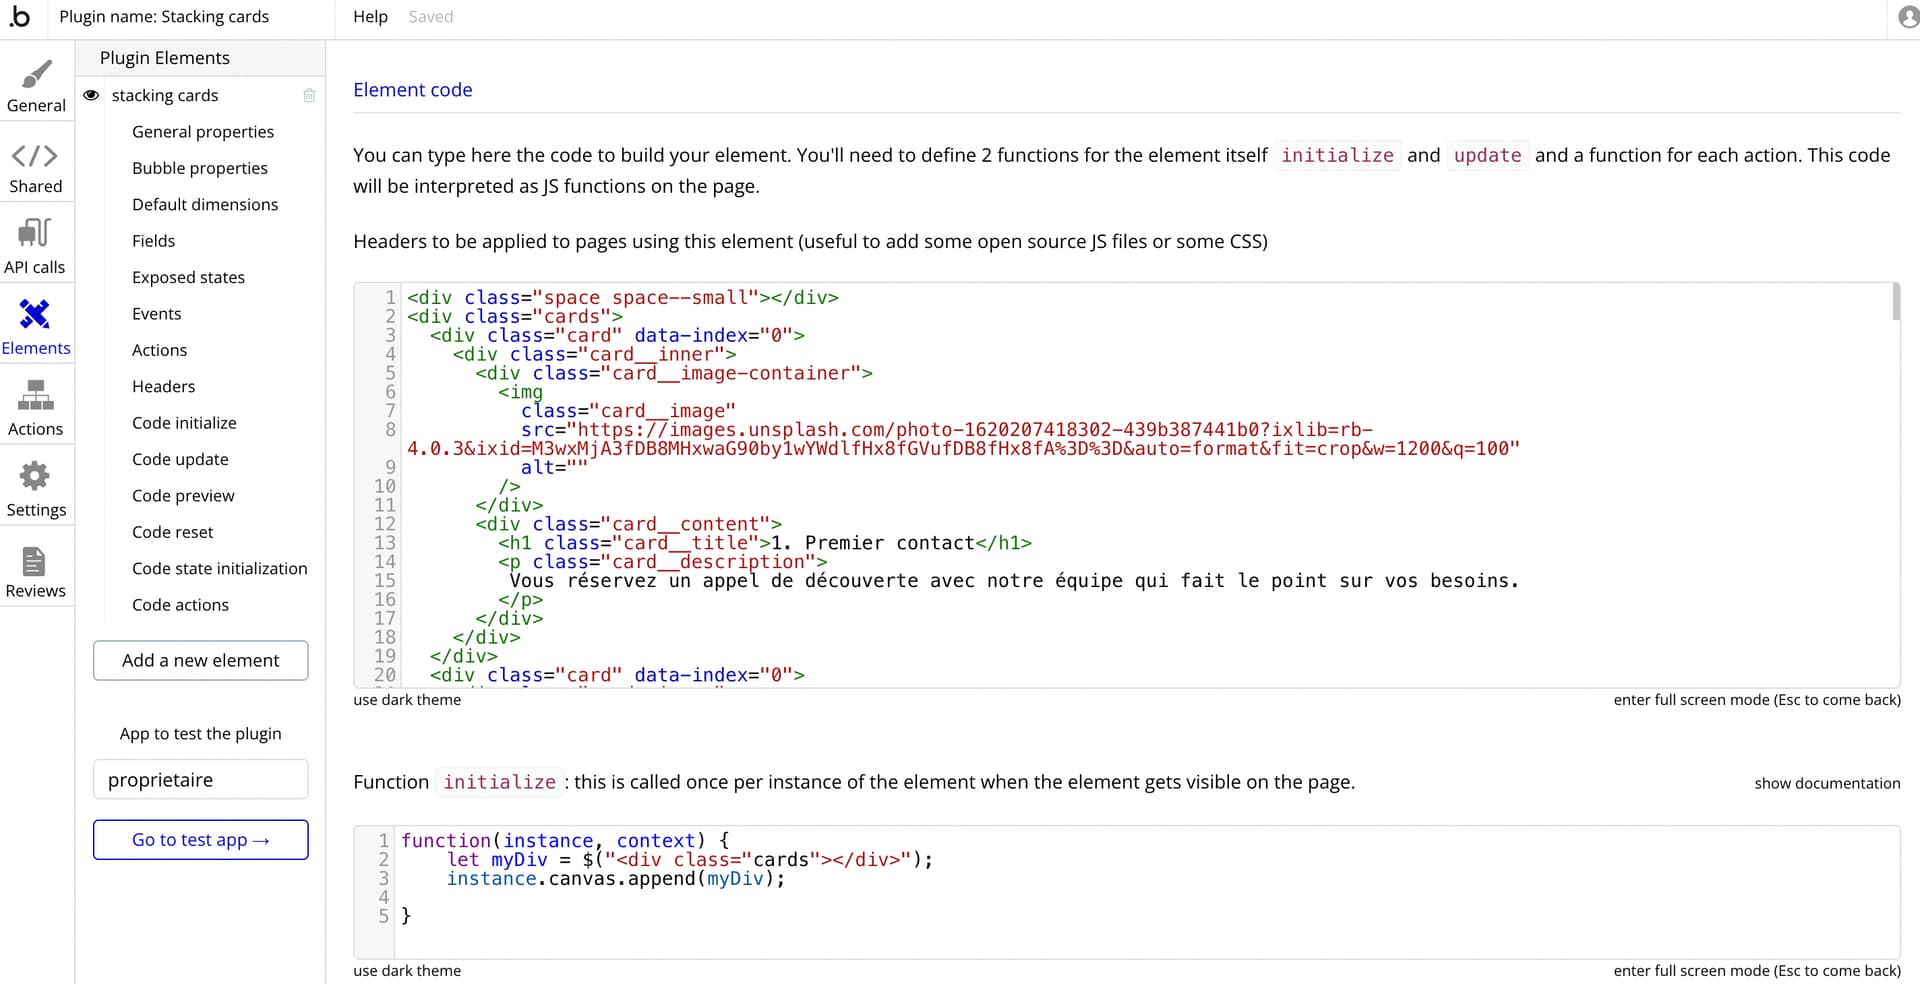
And here is how I setup my HTML in the plugin builder:
The full code I copy/pasted from the link above is like this :
<div class="space space--small"></div>
<div class="cards">
  <div class="card" data-index="0">
    <div class="card__inner">
      <div class="card__image-container">
        <img
          class="card__image"
          src="https://images.unsplash.com/photo-1620207418302-439b387441b0?ixlib=rb-4.0.3&ixid=M3wxMjA3fDB8MHxwaG90by1wYWdlfHx8fGVufDB8fHx8fA%3D%3D&auto=format&fit=crop&w=1200&q=100"
          alt=""
        />
      </div>
      <div class="card__content">
        <h1 class="card__title">1. Premier contact</h1>
        <p class="card__description">
         Vous réservez un appel de découverte avec notre équipe qui fait le point sur vos besoins.
        </p>
      </div>
    </div>
  </div>
  <div class="card" data-index="0">
    <div class="card__inner">
      <div class="card__image-container">
        <img
          class="card__image"
          src="https://images.unsplash.com/photo-1620207418302-439b387441b0?ixlib=rb-4.0.3&ixid=M3wxMjA3fDB8MHxwaG90by1wYWdlfHx8fGVufDB8fHx8fA%3D%3D&auto=format&fit=crop&w=1200&q=100"
          alt=""
        />
      </div>
      <div class="card__content">
        <h1 class="card__title">2. Création de votre annonce</h1>
        <p class="card__description">
          Nous envoyons un photographe professionnel pour capturer votre appartement, puis notre équipe crée une annonce de qualité, diffusée sur l'ensemble de nos canaux de distribution. Un account manager dédié vous accompagnera tout au long de notre collaboration.
        </p>
      </div>
    </div>
  </div>
  <div class="card" data-index="0">
    <div class="card__inner">
      <div class="card__image-container">
        <img
          class="card__image"
          src="https://images.unsplash.com/photo-1620207418302-439b387441b0?ixlib=rb-4.0.3&ixid=M3wxMjA3fDB8MHxwaG90by1wYWdlfHx8fGVufDB8fHx8fA%3D%3D&auto=format&fit=crop&w=1200&q=100"
          alt=""
        />
      </div>
      <div class="card__content">
        <h1 class="card__title">3. Collaboration</h1>
        <p class="card__description">
		Gardez un œil en temps réel sur votre activité locative grâce à votre tableau de bord propriétaire. Suivez l'évolution de vos revenus, le taux d'occupation, et accédez à toutes les réservations ainsi qu'au détail de vos calendriers pour l'ensemble de vos biens.
        </p>
      </div>
    </div>
  </div>

  <div class="card" data-index="0">
    <div class="card__inner">
      <div class="card__image-container">
        <img
          class="card__image"
          src="https://images.unsplash.com/photo-1620207418302-439b387441b0?ixlib=rb-4.0.3&ixid=M3wxMjA3fDB8MHxwaG90by1wYWdlfHx8fGVufDB8fHx8fA%3D%3D&auto=format&fit=crop&w=1200&q=100"
          alt=""
        />
      </div>
      <div class="card__content">
        <h1 class="card__title">4. Sans engagement</h1>
        <p class="card__description">
Vous avez 60 jours d’essai pour décider si l’accompagnement vous satisfait. Ensuite, c’est sans engagement, il suffit d’honorer le préavis de 90 jours.

          <br> PS : nous vous aimerons toujours.

        </p>
      </div>
    </div>
  </div>
</div>
</div>
<div class="space"></div>


<style>


@import url('https://fonts.googleapis.com/css2?family=Inter:wght@400;700&family=Montserrat:wght@400;500&display=swap') ;

* {
  box-sizing: border-box;
}

body {
  background: #ffffff;
  font-family: 'Montserrat';
}

.card {
  position: sticky;
  top: 0;
}

.card__inner {
  will-change: transform;
  background: white;
  border-radius: 14px;
  display: flex;
  overflow: hidden;
  box-shadow: 0 25px 50px -12px hsla(265.3, 20%, 10%, 35%);
  transform-origin: center top;
}

.cards {
  width: 100%;
  max-width: 900px;
  margin: 30px auto;
  display: grid;
  grid-template-rows: repeat(var(--cards-count), var(--card-height));
  gap: 40px 0;
}

.card__image-container {
  display: flex;
  width: 40%;
  flex-shrink: 0;
}

.card__image {
  width: 100%;
  height: 100%;
  object-fit: cover;
  aspect-ratio: 1;
}

.card__content {
  padding: 40px 30px;
  display: flex;
  flex-direction: column;
}

.card__title {
  padding: 0;
  margin: 0;
  font-size: 48px;
  font-weight: 600;
  color: #16263a;
  font-family:'Montserrat';
}

.card__description {
  line-height: 1.4;
  font-size: 16px;
  color: #16263a;
  margin-top:24px;
}

.space {
  height: 90vh;
}

.space--small {
  height: 40vh;
}

@media (max-width: 600px) {
  .card__inner {
    flex-direction: column;
  }

  .card__image-container {
    width: 100%;
  }

  .card__image {
    aspect-ratio: 16 / 9;
  }

  .card__title {
    font-size: 32px;
  }

  .card__description {
    font-size: 16px;
  }

  .card__content {
    padding: 30px 20px;
  }
}

</style>


<script src="https://unpkg.com/aatjs/dist/aat.min.js">


const { ScrollObserver, valueAtPercentage } = aat

const cardsContainer = document.querySelector('.cards')
const cards = document.querySelectorAll('.card')
cardsContainer.style.setProperty('--cards-count', cards.length)
cardsContainer.style.setProperty(
  '--card-height',
  `${cards[0].clientHeight}px`
)
Array.from(cards).forEach((card, index) => {
  const offsetTop = 20 + index * 20
  card.style.paddingTop = `${offsetTop}px`
  if (index === cards.length - 1) {
    return
  }
  const toScale = 1 - (cards.length - 1 - index) * 0.1
  const nextCard = cards[index + 1]
  const cardInner = card.querySelector('.card__inner')
  ScrollObserver.Element(nextCard, {
    offsetTop,
    offsetBottom: window.innerHeight - card.clientHeight
  }).onScroll(({ percentageY }) => {
    cardInner.style.scale = valueAtPercentage({
      from: 1,
      to: toScale,
      percentage: percentageY
    })
    cardInner.style.filter = `brightness(${valueAtPercentage({
      from: 1,
      to: 0.6,
      percentage: percentageY
    })})`
  })
})
</script>
Hey,
In your plugin, HTML must not be put on headers.
Also, you create an empty div inside your initialize section, so nothing will happen.
I think you can try it without a plugin.
Place all your full code inside an HTML element.
After that, you’ll need some adjustments, as the code in CodePen is not wrapped in a container but placed directly inside the body.
The idea is to put all your code inside an HTML element, make that element full width and fit height. You might want to put this HTML element inside a container with a limited height and make it scrollable (check the “Allow vertical scrolling when content overflows” option).
However, be aware that scrollable sections inside a scrollable page can sometimes be tricky to integrate.
You’ll likely need to adjust the JavaScript and CSS accordingly.
Thanks for your answer,
I tried it with an HTML element, but as you said it’s pretty tricky and create a second scroll on the page,
I’ll try it again this way and see what I can achieve.
Lastly, using a custom plugin, can I simply format my HTML in javascript in the initialize function ?
thanks again for your answers,
Cheers