ImagePro Image Tools - New Plugin from Gimazu

Hi, @gm.zumbo!

I was doing several tests trying to figure out the issue.

Here is what I discovered.


I created a NEW blank page.

And used:

  • Loader

  • Reducer

  • Cropper

The Reducer uses the “Loader Image”

The Cropper uses the “Reducer Resized Image”

I keeped the initial setting for all objects, except the Cropper:

VIEW MODE = 0

DRAG MODE = move

Here is the discovered:

On Action GET Crop

Using:

USE FILL COLOR = not checked

IMAGE FORMAT = image/png

The result is IMAGE with “WHITE BORDER”

If settings is:

IMAGE FORMAT = image/jpeg

The result is IMAGE with “BLACK BORDER”

No matter if FILL COLOR = “ANY COLOR”

Resume: The bug is IMAGE FORMAT and USE FILL COLOR do not work with JPEG.

As I said, I am not a digital image expert but I think JPEG delivers a better compress (size) result.

And smaller size results are what I need most.

Could you please check this issue?

Hi, @gm.zumbo!

Do you have any feedback?

@polenvinagre, the plugin has no problem.
First of all it is important that you have some knowledge about image formats.

The “png” format allows the use of an alpha channel for transparency; if you choose this format you can use the “use fill color” option: if checked all transparent areas will be colored with the “fill color” option. If not checked all transparent areas will remain transparent (it is what you call “WHITE BORDER” which is not white, it is simply transparent and shows the white in the background)

The jpeg format does not allow to have an alpha channel for transparency and for this reason the plugin will fill each transparent area with the color set in “fill color” option

PNG Transparent example

PNG Filled (No transparent) example

JPEG example

@gm.zumbo,

Maybe I have some wrong settings.

But as you can see in the picture below.

USE FILL COLOR: Is checked

FILL COLOR: #009400

IMAGE FORMAT: image/png

But the result does not have the color selected.

I need help to understand what I am doing wrong.

Because in your examples the FILL COLORS works.

But my configuration does not work.

hi @polenvinagre,
if you send me in pm editor app link I can check your settings and workflows

Hi, @gm.zumbo!

Me again…

Could you advise me what configuration I can use to have a better result?

If I Crop a picture that has an original ratio 1:1 to 15:1 ratio the result is a bad quality image.

If I use another program like Microsoft Office Picture Manager to crop the original picture (1:1) to a ratio closer to (15:1) and then use the plugin I get a better picture.

Thanks in advance!

Hi, @gm.zumbo!

Could you give me some feedback?

Hi @polenvinagre,
Sorry for the delay.
The Aspect ratio has no relation to image quality.
This depends primarily on the resolution of the original image.
Then the Reducer element (if you use it) compresses the image and consequently causes a loss of quality (the quality is inversely proportional to the size of the image set → “Max” option).
The final result is then determined by the actual size of the crop and whether or not the “smoothing quality” option is activated in the “Get Crop” action.
Microsoft Picture Manager (or any other software) does not shrink the image before crop.
If you don’t use the “Reducer Element” before the Cropper Element, or set the “Max” property to a high value the final result will improve (if the initial image resolution is sufficient).
The suite allows you to choose which elements to use to obtain a final result, choosing whether to opt for higher quality or smaller size

Hi, @gm.zumbo!

I was trying different approaches. I changed the “MAX option”, but without success.

English is not my first language so I will try my best to clarify.

You said: -”The Aspect ratio has no relation to image quality.”

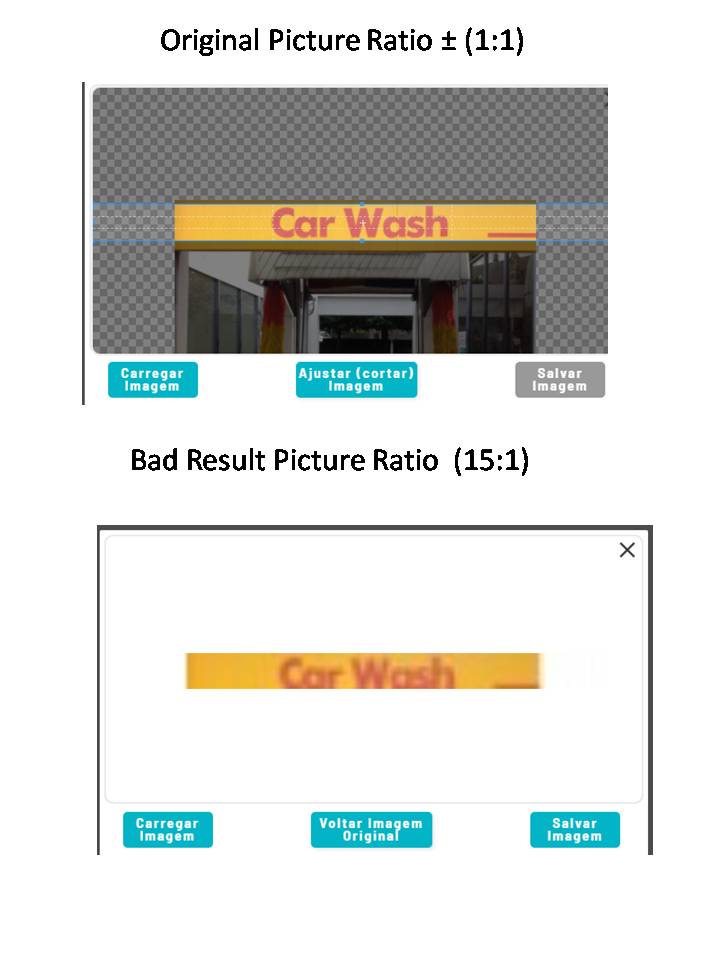
But at first glance, when the Original image RATIO changes it also changes the quality image result.

You said: -”(the quality is inversely proportional to the size of the image set → “Max” option).”

But if I am using the SAME settings, why does the quality issue not affect all images? And only affect when the Ratio it is not “proportional”

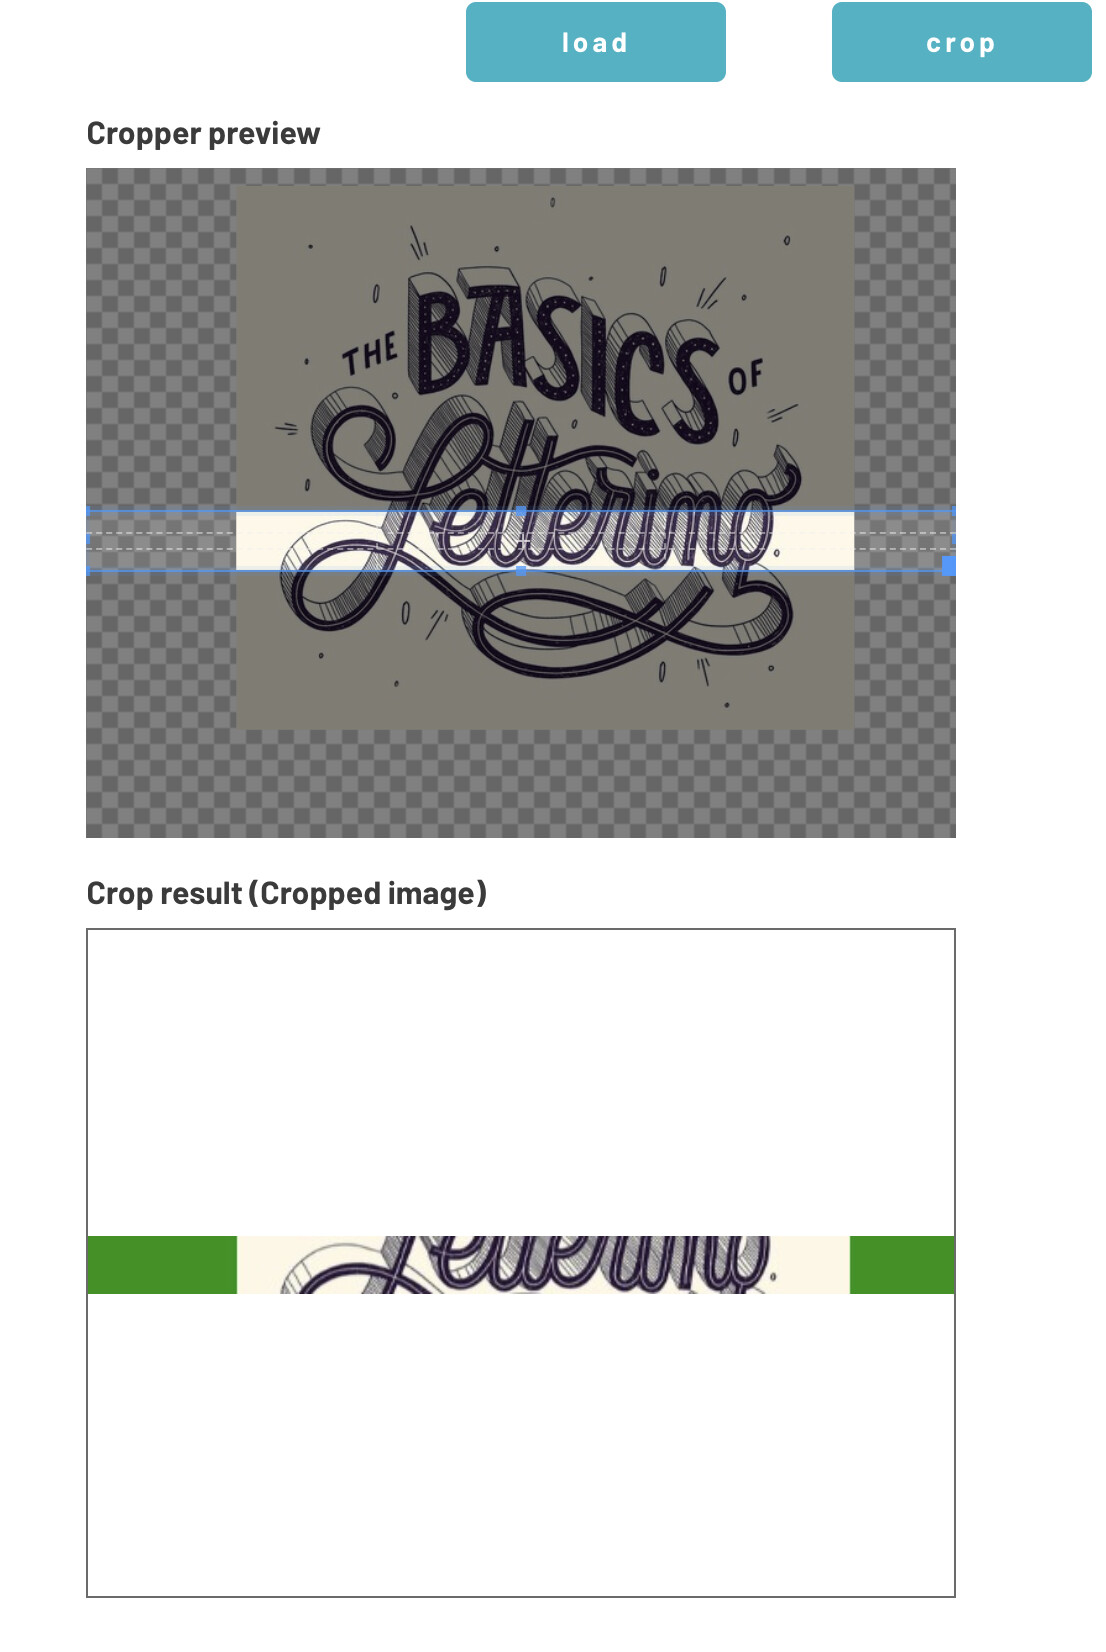
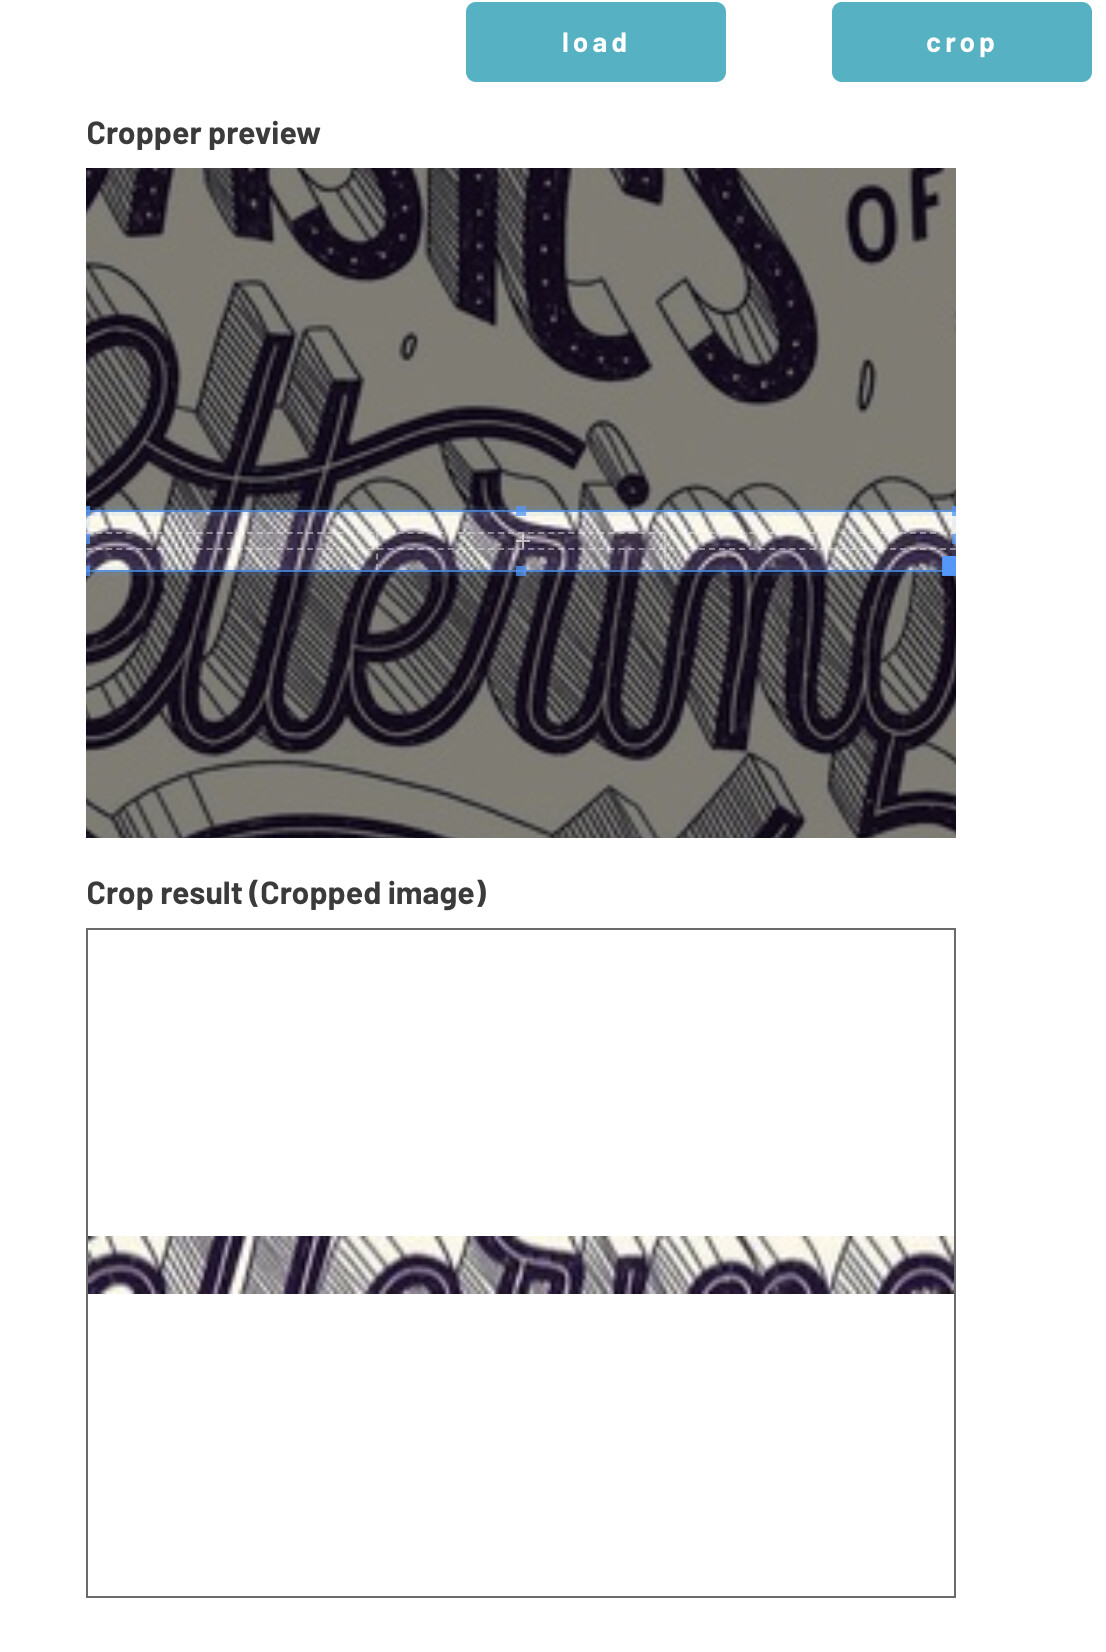
I did another test as you can see in the 3rd picture and the result is worse as the Original Ratio is different from the expected Ratio result.

I need to use the Reducer feature in order to minimize storage cost. I am aware that there is a trade off in quality.

But in all other images I have good results in terms of size and quality.

Only when the “RATIO” or any other unknown properties changes, I have problems with quality. If the results were not so bad I will handle it but, it is very bad to publish it.

I am not comparing Microsoft Office Picture Manager and Image Pro Plugin results.

I am using the SAME SETTINGS for ALL examples. Except the original image that I changed to explain the issue.
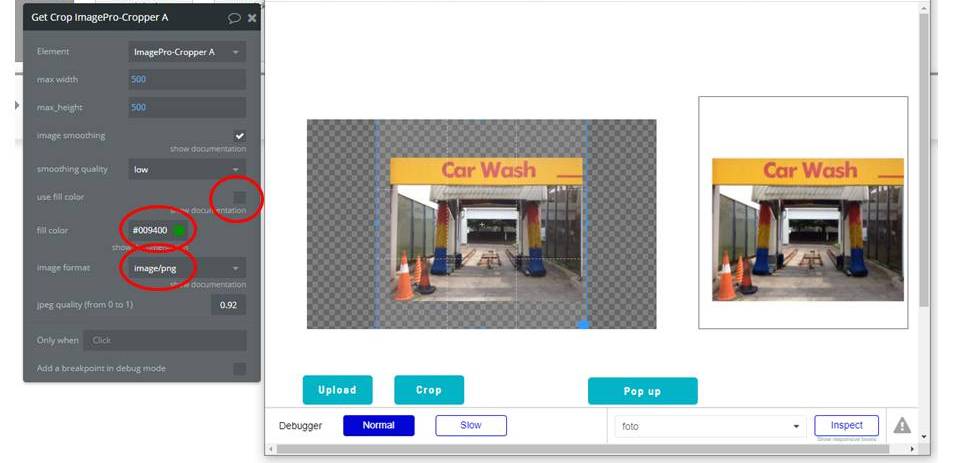
The issue is:


Let’s say we have a picture named Image_A

.

1- If Image_A is 1:1 ratio and I Crop with a 15:1 ratio I have BAD quality image results

2- If I use another software like Microsoft Office Picture Manager to “pre” crop Image_A that now becomes Image_A_pre_crop to a ratio near 15:1.

2.1 And then I use the Image Pro plugin to crop with a 15:1 ratio Image_A_pre_crop I have GOOD quality image results.

Another example:

So the question is: Why do I have different quality results when the RATIO of the original image changes?

If it is not the RATIO the correct word/property. What I can do to reduce size and keep good quality for images with ratio 15:1?

@polenvinagre,
using a crop ratio of 15: 1 on an image with original crop ratio 1: 1 (reducer settings “max” to 500) I have no problem as you can see from the attached image (I used an image with fonts to evaluate the quality of the lines)

I made tests with many zoom levels and the result is always excellent (considering the compression and the crop).

If you want you can send me in pm the image you are testing with, but if the resolution of the starting image is good, the crop will be good.


Solved!

It was my configuration that was incorrect.

The corrected provided by gm.zumbo is:

Min CropBox Width → 0

Min Cropbox Height → 0

max width → 500

max_height → 500

I recommend it for everybody who wants to reduce cost with storage and keep good quality pictures.

It also has good support provided by the creator.

Thanks @gm.zumbo for your support.

I have a quick suggestion on to how to make the plugin even better:

Problem: I use following workflow: Browse Image - Reduce ImageProLoader’s Loaded Image - when reduced: show cropper.
If I now go back to where the “Browse Element” is, click it, and select the same image, my workflow does not run because basically the Loader/reducer is not doing anything because I loaded the same image.

Possible solution: the possibility to run an action - that resets a Loader.

Hope I was clear & maybe it can be solved in another way.

hi @maze,
Loader element supports bubble standard input reset workflow “Reset group” or “Reset relevant inputs”.
So, if Loader is in a Group, you can run “Reset group” (Reset data) workflow to reset loader.

1 Like

Awesome works perfectly - I just needed to put the element inside a group and then reset that group. I am sorry did not know that!

Hello, I just subscribed today and I’m trying to upload/process high resolution image. Some questions:

  1. The reducer component does not seem to work when I use beyond 4000 pixels as my max resolution. Is there a way around that?
  2. Is there documentation on how to make the Uploader work? I can’t seem to make it work for my Flickr image upload

Basically my use case is as follows:

  1. User uploads any image
  2. The converts all images to a standard size using reducer and cropper (for example: 3000 x 4800)
  3. hi resolution image is uploaded to a predefined flicker account

Would really help. Thanks in advance!

HI @dodong.montino,
the reducer component works up to 4096 max value because some versions of safari on iOS do not support a value higher than this. However, making the browser do a compression (because the strength of this plugin is that the compression works on the client side without subtracting time and resources from the server!) with images larger than this limit does not make sense. Even more so if the resized image must then always be cropped on the client side.
If you really need it I can increase this limit in a new version of the plugin.

The uploader element can upload to bubble server or a different server only if managed by you (and therefore not on Flickr). Each server has specific api for managing user authentication and subsequently for uploading content.

In order to understand how each element of the plugin works, you can access the link of the editor view that you find in the example application and that I report here for convenience.

Thank you @gm.zumbo for the quick response!

Yes it would really help if we can get max to at least 4961 for the use case we’re looking at. Noticed that cropper also reduces the pixels to 4096. Hope that and the other components can be adjusted too.

Also, is there any chance we can fine tune position of watermark? (i.e. X pixels from left, Y pixels from top.) Was wondering if we can use it for image overlays instead of watermarking. Thanks again!

@dodong.montino
4096*4096 pixels it is a limit that does not make sense to exceed if you want your app to work on every browser.
Safari does not support canvas elements (used for client-side image manipulation) larger than this limit.
Here is a link that explains what I am saying.

Since the goal of a web application is to work on any browser / device pair, it makes no sense to exceed this limit.
On the other hand, there is no big difference between 4096 and 4961. Also keep in mind that when working on such large images the upload and download (view) times on server bubble become extremely long, worsening the user experience.
I suggest you work with smaller images also because in terms of perceived quality there is no big difference (since most users use mobile devices or tablets)

As for the watermark element you can certainly use an overlay image as a watermark (by setting the watermark image property).
X/Y position is not possible but you can use 5 predefined positions (lower left, lower right, upper left, upper right and center) that take care of calculating the correct x / y position (if possible) according to the size of the image or text used as watermark

Thanks for your response! I was hoping to use this for print applications but I got your point.

Hi @gm.zumbo – Regarding circular crop feature:

I need to crop a user’s existing square profile PNG into a circle with transparent background, to be used in a Bubble plugin (as map markers in the Mapbox plugin). In other words, I can’t use Bubble’s tools for roundness.

I tried ImagePro and several other element-to-png plugins, but none could create a round png with transparent background.

Is there a way to do this with ImagePro? Or do you have any other suggestions?

Thanks