Goal: Convert my current Bubble app to a native mobile app
Reference post:
I’m currently trying to document every step I made in detail. Hopefully this post can empower the fellow Bubble community to build native apps slightly faster.
Here’s the documentation day #1:
Basic setup
On Bubble
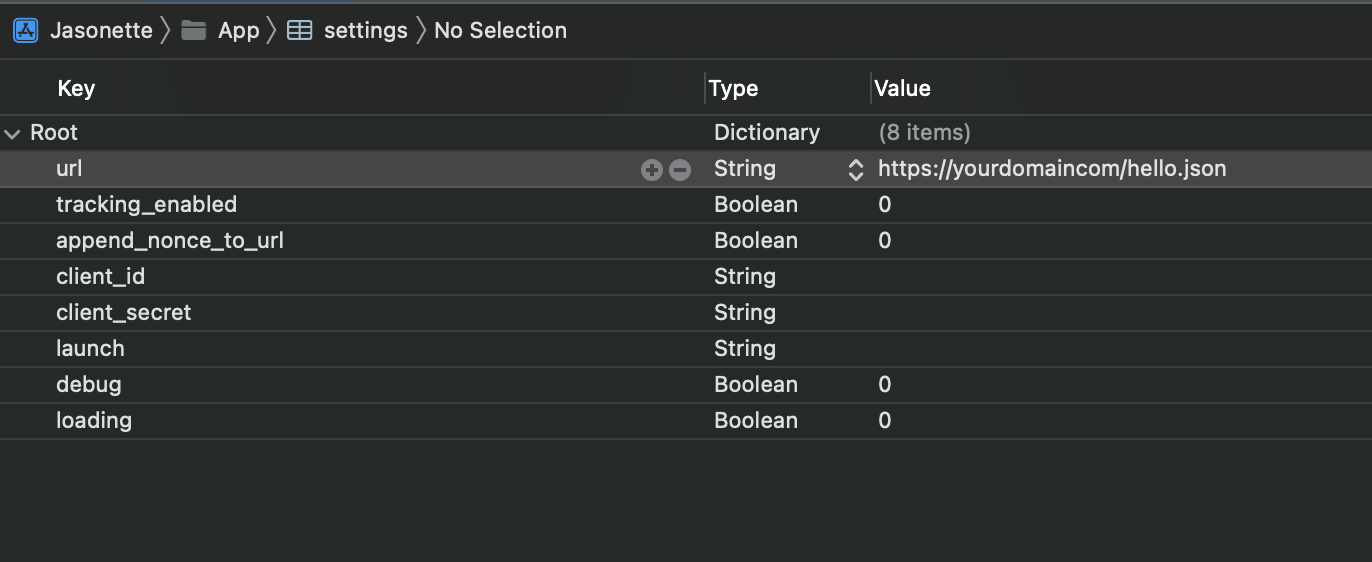
Create an empty txt file, name it hello.json (the name doesn’t matter). Open the hello.json file with any text editor. Add this JSON text into it. Replace the https://www.yourdomain.com with the url of your app. This will be the onboarding page of your app.
Open the jasonette-android project with Andriod Studio
Open the strings.xml file (app > res > values > strings.xml).
Replace the string “file://hello.json” with the url of the .json file you just uploaded to your bubble app. The url should be something like “https://www.yourdomain.com/hello.json”.
Now you can try to build the apk or run it on AVD. Remember to install the Android SDK.
This is what I’ve done so far. My next step would be to convert the Bubble app to an IOS native app. I will keep documenting everything and share it here.
Tried to upload my app to the Google Play Store before working on the iOS version. A bit of a learning curve so I guess it’s worth posting it here.
Here’s the documentation #2
1. Update App ID
You have to edit the applicationId before submitting the app to the google play store. This ID uniquely identifies your app. Usually looks like com.example.myapp.
To make the change, go to Gradle Scripts > build.gradle (Module: app), and find the applicationId attribute. It should be com.jasonette by default. Replace it with your own unique id.
2. Target API level
When uploading a bundle to the google play store, you have to Meet Google Play's target API level requirement | Android Developers. So, before creating the bundle, set the target API level to a higher version. Again, go to build.gradle (Module: app). You can find the targetsdkversion attribute there.
You should also change the compileSdkVersion because it cannot be lower than the targetsdkversion.
3. Upload a signed bundle
When releasing using Android App Bundles, you need to sign your app bundle with an upload key. To do this, click Build > Generate Signed Bundle/APK… on the Menu bar. I guess I will write a step-by-step guide for this.
So here is document #3 for generating an upload key and Keystore:
Open the Andriod Studio. Click Build > Generate Signed Bundle/APK… on the Menu bar.
Click Next to generate a signed app bundle.
Click Create new… to create a new keystore.
The alias_name can be anything. Just remember it. Fill in the rest of the form. Then click OK to create a Key Store.
Check the box next to Export encrypted key and specify a path to save your signing key as an encrypted private_key.pepk file.
Click Finish.
After Android Studio finishes building your signed app, you can locate your app by clicking on the pop-up notification. You should be able to see the .aab file. This is the app bundle that you can upload to the play store.
Hello everyone! I’m trying to wrap the bubble app. I’m using jasonette iOS 2.1. While I’m following steps from here, I’m getting some 78 issues in Xcode, and the app in the simulator looks like it doesn’t receive data, the app is empty without data. Any suggestions? Thank you!
Yes, you need a Mac. Technically you can run Xcode on a virtual machine (VMware or Virtual Box), but it is not a good idea. It is slow and it crashes frequently.