Thank you for such a detailed description.
We assumed that when using auto binding, users would disable change tracking. In addition, we purposefully used “initial Content” in all cases so as not to confuse users. But as it turned out, all this, on the contrary, confused everyone even more.
You were right in many respects, but there are still nuances. When using autobinding, it is not possible to unconditionally use “initial Content”. The “initial Content” field can only be used if the field associated with autobinding is empty. If, when loading the editor, some initial content is loaded from the “initial Content” field, then the field that was used for autobinding will be overwritten with this data (data from the “initial Content”). And this, as you understand, is not correct behavior. There are a number of other minor problems.
So this is what we did:
changed behavior when auto-binding. Now, if auto-binding is enabled, the “Do not track initial Content” parameter is disabled (those. his condition is not taken into account), and “initial Content” will be used only if there is any significant content in the field associated with auto-binding. Meaningful content means text or styles or formatting.
Those. if there is no text, but there are styles or formatting, then the content is not empty.
The editor loads and as initial content it automatically uses the data that was used for auto-binding, if any, otherwise the data from “initial Content” is used
If auto-binding is not enabled, then the initial data is loaded from the “initial Content” field and, depending on the “Do not track initial Content” state, changes to the data that are connected to the initial Content field will either be tracked or not.
the “Do not track initial Content” option is now enabled by default. If the user needs it, he will disable this option. But this is as I wrote above only if automatic binding is not enabled.
In principle, tracking changes in the initial content is not so necessary. But we added this feature at the request of one of the users who did not use auto-binding but wanted to track changes in the initial content.
So leave the “Do not track initial Content” checkbox checked and this will not affect the editor’s work in any way.
Integrated font “Helvetica-Neue” - this will help if this font is not installed on the user’s system.
font “Helvetica-Neue” is used as the default font in the editor. Previously, if the user’s system did not have this font, the default system font was used.
other minor improvements.
Please update the plugin v1.0.19
I created a simple example of using autobinding:
Sorry for the inconvenience.
And thank you for your contribution to improving this plugin.
Wow! A world of difference! I do truly appreciate your attention to this.
Autobinding worked immediately. The editing while autobinding is easily the best I’ve seen. It keeps its place while updating and is probably good enough to let loose on my customers.
Sorry! I spoke too soon. The autobind works on the first target you give it, but if you change the target it overwrites the new target with the old target’s data.
Essentially, if you have a repeating group of things with “Content” the first item you select will populate the WYSIWYG and then no matter what you pick after that, the first items data gets copied to all the other items. Any ideas?
I’m confused, I just checked in our test application how the editor works with a repeating group and did not notice any problems.
Sorry, but it’s not entirely clear what you mean. What do you mean by goal and how do you change it.
Here is a demo of the editor working in a repeating group using auto-binding:
I sent you a private message with a link to the editor of our test application with the editor plugin connected. Please create an example that shows what you are trying to do and what the problem is.
Apologies for the confusion, I mean that when a user selects an item from a repeating group that you have one WYSIWYG (external to the repeating group) that reflects the content chosen.
Below is the app in question and user selects a piece of content from the repeating group on the left to edit in the WYSIWYG on the right. This sets a state variable (eg: “content-selected”) that points to the selected content. The WYSIWYG’s data source is always “content-selected” and should the contents of the WYSIWYG should change as the user selects different items in the repeating group.
Instead, the WYSIWYG does not reset and keeps reflecting the first item selected and continues to overwrite any other items selected if you click into the editor. Eventually, EVERY piece of content in the repeating group is the same as the initial piece of content selected.
AAA! Now I understand.
Sorry, for some reason I was in a loop and thought that you were putting the text editor in a repeating group.
I think you just need to use the “Set Contents” action every time you select a new cell in a repeating group.
.
Use “sets a state” to store the number of the current cell of the repeating group. For example, I created “sets a state” = “current_index” in the repeating group itself.
Each time you click on a cell of a repeating group, we will set the state to “current_index”=“Current cell’s index”. Thus, in the “current_index” state we will always have the number of the current cell recorded.
Standard auto-binding connection.
3. enable auto-binding in a text editor and enter “Type of content” and “Data source” for the parent element. If necessary, you can specify restrictions in the “Data source”. For example, I selected only cells whose type = “rg”
As seen in the “Data source” we are passing the current element (the element with the number that we take from the state saved in point 2.)
.
Well, the last step. Every time we click on a cell of a repeating group, we will install the content from the current cell into the editor through a workflow.
Thanks! I’ll look into this as I think this is the preferred approach for my use case. I’ve continued with the Don’t track approach and built a complicates locking system around it so can’t just swing back at the moment, but will at some point shortly. The demo seems to do what is needed however. But also, a comment, the developer shouldn’t have to force an autobind field to re-initiate its content. This behavior is contrary to every other autobind behavior in the Bubble platform. I know the RTE’s are particularly tricky, but it is out of place to be “autobinding” but also require “setting”. Thanks for a GREAT plugin!
I can’t say enough about the guys at @MindForApps ! Over the past week, we have worked on their WYSIWYG editor and it is by far the best available. It has been a struggle for many years to find a Plug In developer that is capable of delivering stable and rich plugins but a big thank you the Mind for Apps team! I truly appreciate it!
Hi @MindForApps, the WYSIWYG is performing very well.
I’m looking to use the output of this WYSIWYG as the input for AI ingestion. Do you have any interest in making this plugin capable of spitting out a PDF version of itself that could be attached to a Bubble record? I understand that this is not what the plug in is intended to do, but I do think it would be an amazing feature.
Also, it appears your element is creating an incredible number of timeouts in the console. Are you able to address this? See below…
I think, the attributes are not getting passed through anymore. I tried it with a clean version of WYSIWYG and just used your code and looking at the field in the database the attributes do not get included. Even though they are listed in the “attrbutesWhitelist”.
Can you maybe check if anything has been changed that may lead to this?
Yes, in version 10.0.22 we have changed and improved the way Whitelist attributes work. And we indicated this in the description of the release.
(Added reset(for inputs) function, improved auto-binding and attributesWhitelist.)
This is a short description because there is a 122 character limit.
At the request of users, we have added the ability to add separate attributes for different tags to “attributesWhitelist”.
For example: div: data-u, img: attr1|attr2 - allow the “data-u” attribute for the “div” tag, and allow the “attr1” and “attr2” attributes for the “img” tag
if you want to allow some attributes for all tags then use “all”
For example: all: attr1|attr2 - for all tags will allow the attributes “attr1” and “attr2”
We’ve added a description of this to the documentation.
Thank you for the quick response. Totally understandable and I missed this info.
However, unfortunately I am not smart enough to understand what I need to do. Can you give another example on what I should do? I want to pass the following HTML to the editor (as in your example in anser #88 in this thread):
Would you mind giving the exact thing I need to put into attributesWhitelist? I tried id: show_popup, style: cursor but it is not working so I assume I am doing something wrong. Two other questions:
Can I use allow any tag and any attribute? If so, how?
Is it still the case that we cannot use any attributes associated with actions starting with “on” or did the recent changes maybe make this possible again? Just checking.
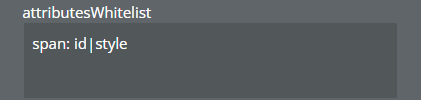
In your case, you are inserting HTML in which you need to allow the “id” and “style” attributes for the “span” tag
Those. in the “attributesWhitelist” field you need to enter: span: id|style
If you want to allow these attributes for all tags then: all: id|style
If you want to remove all restrictions and allow everything for everything: all: *
(I’ll add it to the documentation)
But please keep in mind that in the case of “all”, when inserting third-party HTML, a lot of “garbage” will remain (especially with all: *).
Unfortunately, nothing has changed here. Attributes that start with “on” are still removed.
Phenomenal plugin. I purchased today and it’s going to make my life a lot better. I’m somewhat new to Bubble so bear with me, I’m trying to learn. A couple questions.
My use case is receiving a response from open ai’s api, storing in the database, and autobinding to Advanced WYSIWYG editor. The issue I’m seeing is that it obviously doesnt know how to handle the line breaks here. Whats the easiest and most efficient way to auto-recognize the line breaks?
Is there a way to print just the content via a workflow action?
Thank you for your high rating of our plugin. Glad you liked our work.
Regarding your questions:
1. Most likely you are passing plain text to the editor.
In the text that you transfer to the plugin, the line break is determined by special (not visible characters) - “/n” or “/r/n”
Try replacing them with the HTML tag <br />
(or <br> that will work too)
Use the “:find & replace” action when passing data to the editor.
Or it can be done at another stage, maybe before writing to the database.
But in any case, I think it will be necessary to change “/n” or “/r/n”
to HTML tag <br />
.
2. Now there is no such possibility.
We have been working on this for some time, but there are a lot of problems that we cannot solve yet. That’s why I can’t promise anything right now.
Thank you for the explanation on the line breaks - it gives me a place to start playing with things.
Sounds good on the printing. Would be awesome if it got figured out but understandable the obstacles to work around. Right now, I am using Zeroqode Print Pro to try to print the content by element ID attribute. I am trying to hide the header toolbar of the Element ID attribute via css. It works ok but there’s still a border around the editor content that I cant figure out how to hide. Any ideas you guys have on how to print just the content of the editor and not the toolbar, borders, etc?
Some other feature requests I’d love to throw on your backlog as you continue to build out your outstanding product:
-the ability dynamically feed in font type, font size, and font color. For example, if my user’s preference is to load Pacifico, size 18px, color #E40A2D, that would be awesome. Right now I see you can set it as a default for all, but not seeing the ability to customize by user.
-depending on the default font and size, have the toolbar set to that initially
The “defaultStyle” and “font” fields are now dynamic.
“defaultStyle” will allow you to (dynamically) change default styles (font-family, font size, color, etc.) on the fly.
Using “font” you can dynamically change the list of available fonts (font-family). But keep in mind that the fonts from the list must be installed on the system, otherwise the default fonts will be applied.
That’s exactly how it works. This is visible when the editor is in focus.