[PLUGIN] - TinyMCE Advanced (v6)

v1.49.0

Few bug fixes and other changes outlined below.

  • The plugin’s description has been updated, notably around the Tiny API key as this is now mandatory.

  • Removed the ability to disable the API warning and updated documentation parts inside the ‘Show notification’ action.

  • The ‘Saved to S3’ option has it’s documentation section updated.

  • Slight change to when the ‘has initialized’ event is triggered and a delay option added if you need to control the timing in anyway.

image

  • Fix applied to the file restrictions when selecting image/video files. This now works correctly with an optional alert message you can use to show to your users if they try selecting a file type which is not allowed.

image

Paul

Hey @pork1977gm, fantastic plugin. This action seems to no longer be a thing. How do we include the editor’s styling in the generated HTML content?

Hi @dbevan

The action got renamed to “Set default options” - have you tried that?

Did you see a reference somewhere that mentioned the old action name? If so, I may have missed that, I’ll make sure I update it.

Paul

Thanks for the quick reply. I’m speaking more to these examples:

Editor:

Blog Page:

Editor:

Blog Page:

This is code formatting right? It uses a library called Prism.js and you need to first enable the “Code sample” plugin to get the toolbar icon, then you can select Javascript, paste in the code and it will appear in the editor.

Actually, looking at your screenshots, it seems you’ve got that far right?

The Prism scripts are contained to the editor itself because it all loads within an iframe (I think) so if you want that type of styling applied back on your bubble page, you’ll need to take the scripts below and probably add them to an html element

<script src="https://dd7tel2830j4w.cloudfront.net/f1669309802232x191941853915531520/prism.js"></script>
<link rel="stylesheet" type="text/css" href="https://dd7tel2830j4w.cloudfront.net/f1669309815213x559460806263861060/prism.css">

Hopefully that will allow it to work on your page

Code Sample plugin | TinyMCE Documentation

1 Like

Massive help! Thanks Paul!

1 Like

@pork1977gm this is great! is there a way to use the commenting feature with this plugin? That would be a game changer for us

1 Like

Hi @testimonialhero

This will take me a little time to do but it’s a great feature to have so I will get it done. I need to finish off a couple of other bits first then I’ll jump onto this and let you know when it’s ready. I need to figure out the whole user scenario as to who put what comment and how to get the data in/out of the editor so it may be a little tricky, either way I’ll get back to you as soon as I can.

Paul

1 Like

Update v1.53.0

Premium plugin ‘Comments’

The comments system has been added to the editor. All the configuration for this is held within the “Configure premium plugins” action.

The following new events have been setup for use with this:

  • comment has been created
  • comment has been replied to
  • comment has been edited
  • comment has been deleted
  • comment has been resolved
  • comment conversation has been deleted

Each comment can have some actions on it like so:

A snapshot of the configuration options are shown below.

And a list of all comment activity is stored in a new list state called All comments

Paul

I am faced with a minor issue: I am unable to save the text in the database. The addition is phenomenal and outstanding, but I cannot manage to store the text in the database.Initially, I use the ‘get’ command followed by saving the text as HTML or plain text, but to no avail.Is there a solution?Additionally, how can I remove the Tiny logo from the bottom left corner?Thank you.

Are you using the event which triggers after the Get content action has run?


yes i am

Hey @pork1977gm !!

First off, want to thank you for this plugin - I got solid use of out. It has a ton of features – And it got me through some critical client requests.

Over time, I’ve been learning Javascript - And forked off my own TinyMCE (way less feature rich than your app) – But there is one thing I was able to do that you might find use of - Real checkboxes… That work very similiar to the TinyMCE Checklist premium plugin.

I figure I’d share this with you for all you’ve done - And maybe you can find some use of it!

Here is the CSS that needs to be applied (I put it in the header):

.tox-checklist>li:not(.tox-checklist--hidden) {
    list-style: none;
    margin: .25em 0;
}
.tox-checklist>li:not(.tox-checklist--hidden)::before {
    background-image:url("data:image/svg+xml;charset=UTF-8,%3Csvg%20xmlns%3D%22http%3A%2F%2Fwww.w3.org%2F2000%2Fsvg%22%20width%3D%2216%22%20height%3D%2216%22%20viewBox%3D%220%200%2016%2016%22%3E%3Cg%20id%3D%22checklist-unchecked%22%20fill%3D%22none%22%20fill-rule%3D%22evenodd%22%3E%3Crect%20id%3D%22Rectangle%22%20width%3D%2215%22%20height%3D%2215%22%20x%3D%22.5%22%20y%3D%22.5%22%20fill-rule%3D%22nonzero%22%20stroke%3D%22%234C4C4C%22%20rx%3D%222%22%2F%3E%3C%2Fg%3E%3C%2Fsvg%3E%0A");
    background-size:100%;
    content:'';
    cursor:pointer;
    height:1em;
    margin-left:-1.5em;
    margin-top:.125em;
    position:absolute;
    width:1em;
}
.tox-checklist li:not(.tox-checklist--hidden).tox-checklist--checked::before {
    background-image:url("data:image/svg+xml;charset=UTF-8,%3Csvg%20xmlns%3D%22http%3A%2F%2Fwww.w3.org%2F2000%2Fsvg%22%20width%3D%2216%22%20height%3D%2216%22%20viewBox%3D%220%200%2016%2016%22%3E%3Cg%20id%3D%22checklist-checked%22%20fill%3D%22none%22%20fill-rule%3D%22evenodd%22%3E%3Crect%20id%3D%22Rectangle%22%20width%3D%2216%22%20height%3D%2216%22%20fill%3D%22%234099FF%22%20fill-rule%3D%22nonzero%22%20rx%3D%222%22%2F%3E%3Cpath%20id%3D%22Path%22%20fill%3D%22%23FFF%22%20fill-rule%3D%22nonzero%22%20d%3D%22M11.5703186%2C3.14417309%20C11.8516238%2C2.73724603%2012.4164781%2C2.62829933%2012.83558%2C2.89774797%20C13.260121%2C3.17069355%2013.3759736%2C3.72932262%2013.0909105%2C4.14168582%20L7.7580587%2C11.8560195%20C7.43776896%2C12.3193404%206.76483983%2C12.3852142%206.35607322%2C11.9948725%20L3.02491697%2C8.8138662%20C2.66090143%2C8.46625845%202.65798871%2C7.89594698%203.01850234%2C7.54483354%20C3.373942%2C7.19866177%203.94940006%2C7.19592841%204.30829608%2C7.5386474%20L6.85276923%2C9.9684299%20L11.5703186%2C3.14417309%20Z%22%2F%3E%3C%2Fg%3E%3C%2Fsvg%3E%0A")
}

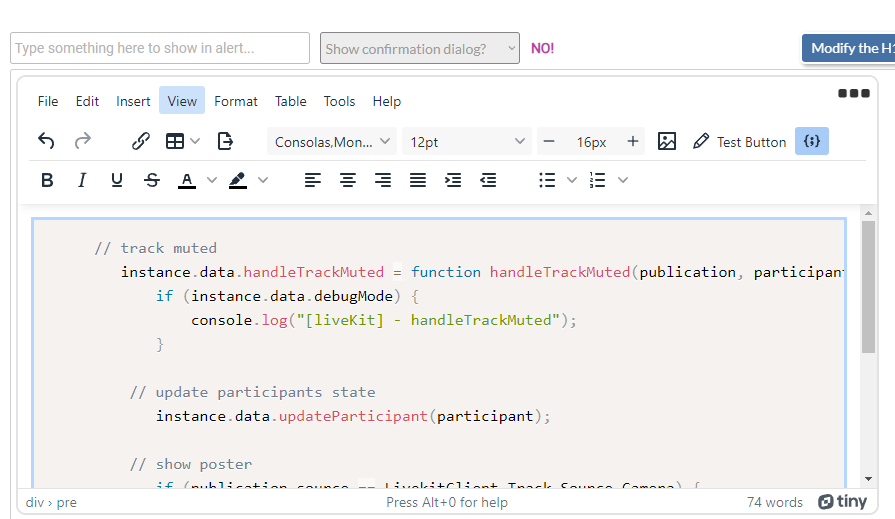
Next, I created a new Registry for the checklist – I did this in the TinyMCE init. (Note that I am updating the state every time this happens – I’m fairly certain that won’t work in your case since you are firing off an event to let someone know that the tinyMCE data is ready…)

editor.ui.registry.addButton('checklist', 
          {
             icon: 'checklist',
             tooltip: 'Insert check list',
             onAction: _onAction
          });

           function _onAction()
            {

               let node = grabLatestNode();


                if (node.className === 'tox-checklist')
                {
                    editor.dom.removeClass(node, 'tox-checklist');
                }
                else
                {
                    editor.execCommand('ApplyUnorderedListStyle', false, {
                        'list-style-type': 'decimal'
                    });

                    node = grabLatestNode();
                    editor.dom.addClass(node, 'tox-checklist');
                    instance.publishState("content", editor.getContent());
                }			

            }
           function grabLatestNode() {

               let getULNode = editor.selection.getNode().parentElement;
                if(getULNode.nodeName !== 'UL') {

                    //If it is HTML, then this means it is at the top of the doc... so get rid of the "parent Element" piece.
                    getULNode = editor.selection.getEnd().parentElement;

                }

               return getULNode;
           }

And finally, I added in the listener that checks the box on and off ONLY when they are clicking the checkbox itself.

 editor.on( 'click', function ( event ) 
            {

            var node = editor.selection.getNode();
            var getter = editor.selection.getSel();
            var parent = node.parentElement;

            if (parent.className === "tox-checklist" && getter.anchorOffset == 0) {
                if ((node.nodeName === "LI") && (node.className === "tox-checklist--checked")) 
                {
                    node.className = "";
                } else if ((node.nodeName === "LI") && (node.className === "")) 
                {
                    node.className = "tox-checklist--checked";
                }
            }
            	instance.publishState("content", editor.getContent());

Anywho, I know that your TinyMCE config is quite different, so not sure if this will help much… but figured I’d share it anyways!

Appreciate you!

Now that’s cool! Massively appreciate info like that, I shall take a good look at some point and see if I can incorporate it. Thanks very much.

That’s not an event, read the text inside the action, I write it for a reason.

@m3uuuf

Sorry, I didn’t understand you. read what? What do you mean? Can you clarify?

i’ll pm u

Hey @pork1977gm ,

Loving the plugin so far, but I’m running into one issue: After I successfully save the content in the text editor for the first time, I cannot add new lines to the text. I can add and edit text on existing lines (then re-save), but hitting “ENTER” won’t create a new line.

My basic setup is:

  • Repeating group. Each with its own TinyMCE Advanced Input
  • Inline editor (stuck to element-id)

I’ve played with both the “Newline behaviour” and “replace line breaks” settings, but neither seemed to fix the issue. Hoping to get some guidance.

Thanks!

Hi Matt, thanks.

Could you send over a few screen shots of how you have it setup for me? I’ll try and replicate it on a test page and see what’s going on.

Paul